Step 1
Find the tenancy where you wish to issue a refund to the tenant and then add a transaction via the tenant rent statement as shown on the image below; You must then enter the correct information regarding the refund as shown on the below diagram. If refunding rent the transaction type will vary between a "rent charge"and a "direct rent";- Choose "Rent charge" if you are a Property Manager
- Choose "Direct rent" if you are a self managing landlord.
Step 2
Once you have added this transaction, you need to synchronise your account. To do so, go to Financials > Go To QuickBooks Online Screen > SynchroniseStep 3
Within QuickBooks, go to Banking Locate the spent item that is being refunded. Ensure you set transaction type to Expense and category to Debtors.
Step 4
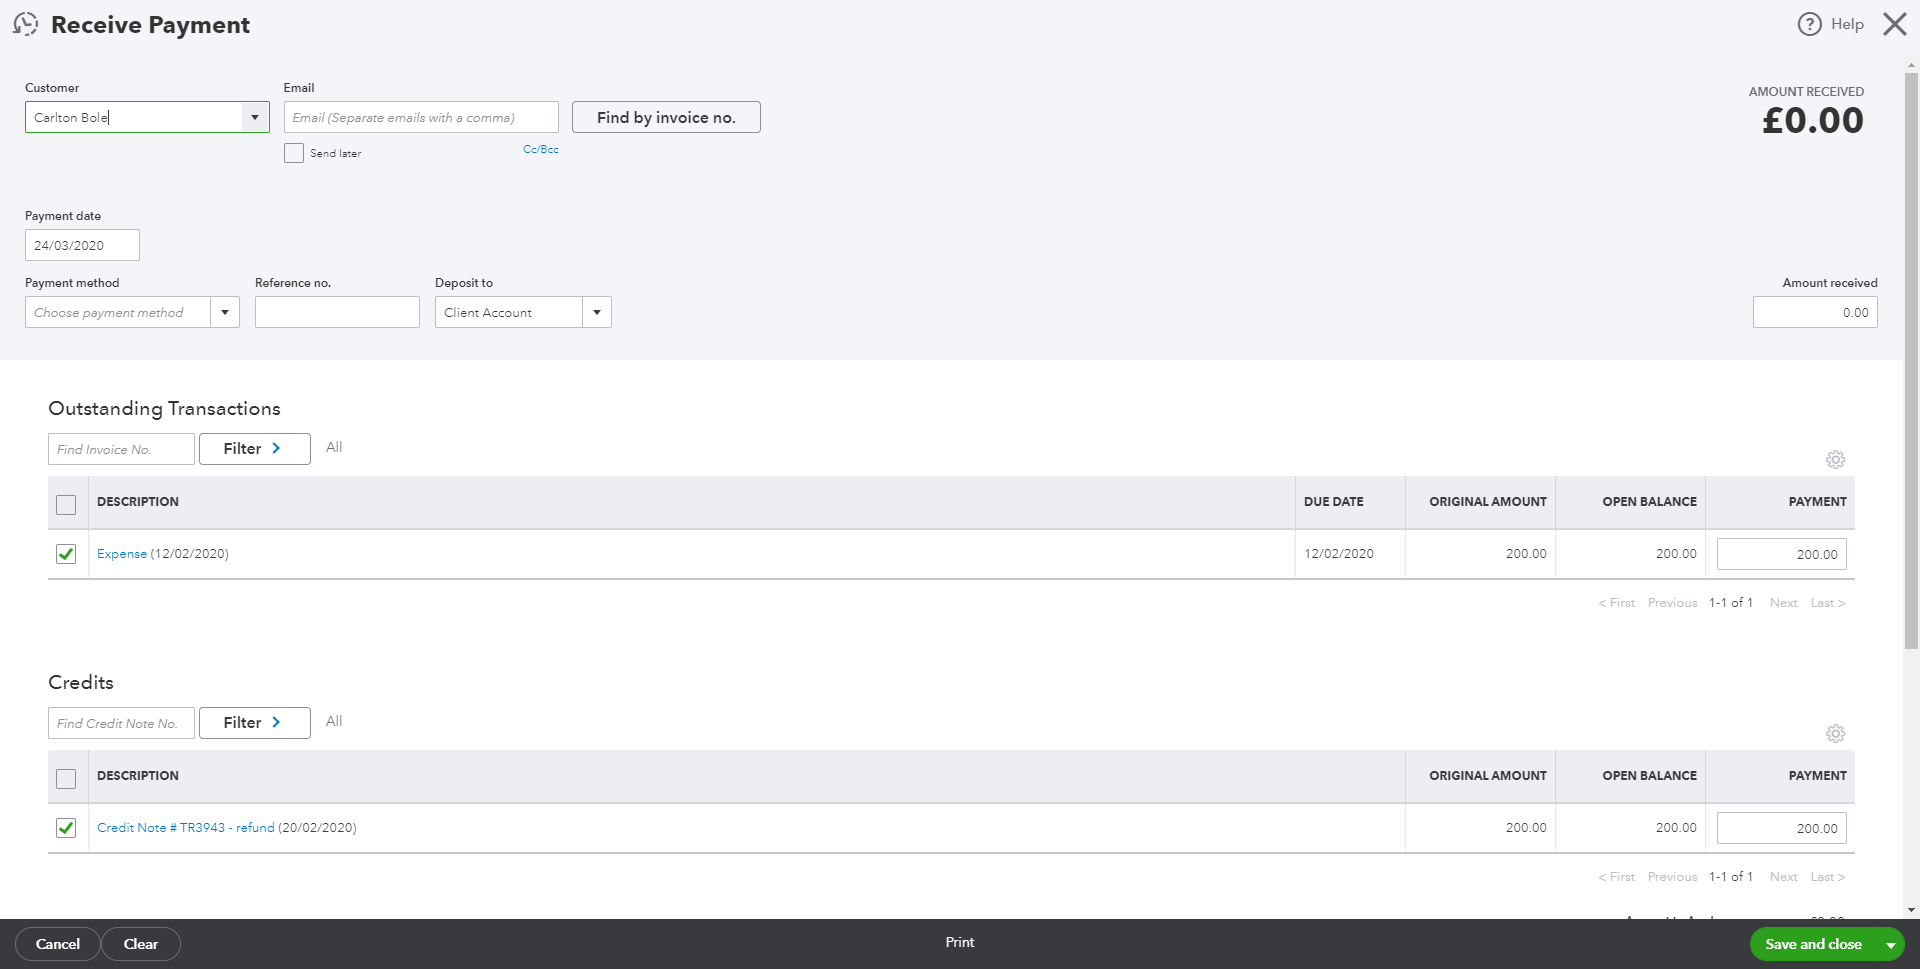
Select +New > Receive Payment Input the customer name and allocate the expense to the credit note refund you created from Arthur.


Was this article helpful?
That’s Great!
Thank you for your feedback
Sorry! We couldn't be helpful
Thank you for your feedback
Feedback sent
We appreciate your effort and will try to fix the article