This article looks at
- Batch payment of contractor bills
- Making payment via contractor payment screen
Batch payment
Financials>contractor bills

Select the status on the left to view All, Voided, Paid, Overdue, Unpaid, Authorised for Payment.

In order to batch remit to your contractors, you must first ensure the transactions are authorized.

There are two ways contractor bills may be authorized. Automation authorization A contractor bill attains the authorized status once the related tenant/property owner transaction is paid off/reconciled or remitted.
Manual authorization: by selecting a transaction with status funds not reserved you will be taken into another screen where you can then manually authorize it for the payment transaction.
Select the relevant transactions that are being paid to the contractor. Note: transactions with status funds not reserved means either the related tenant/property owner transaction are unpaid or there is not related tenant/property owner transaction for the contractor bill. 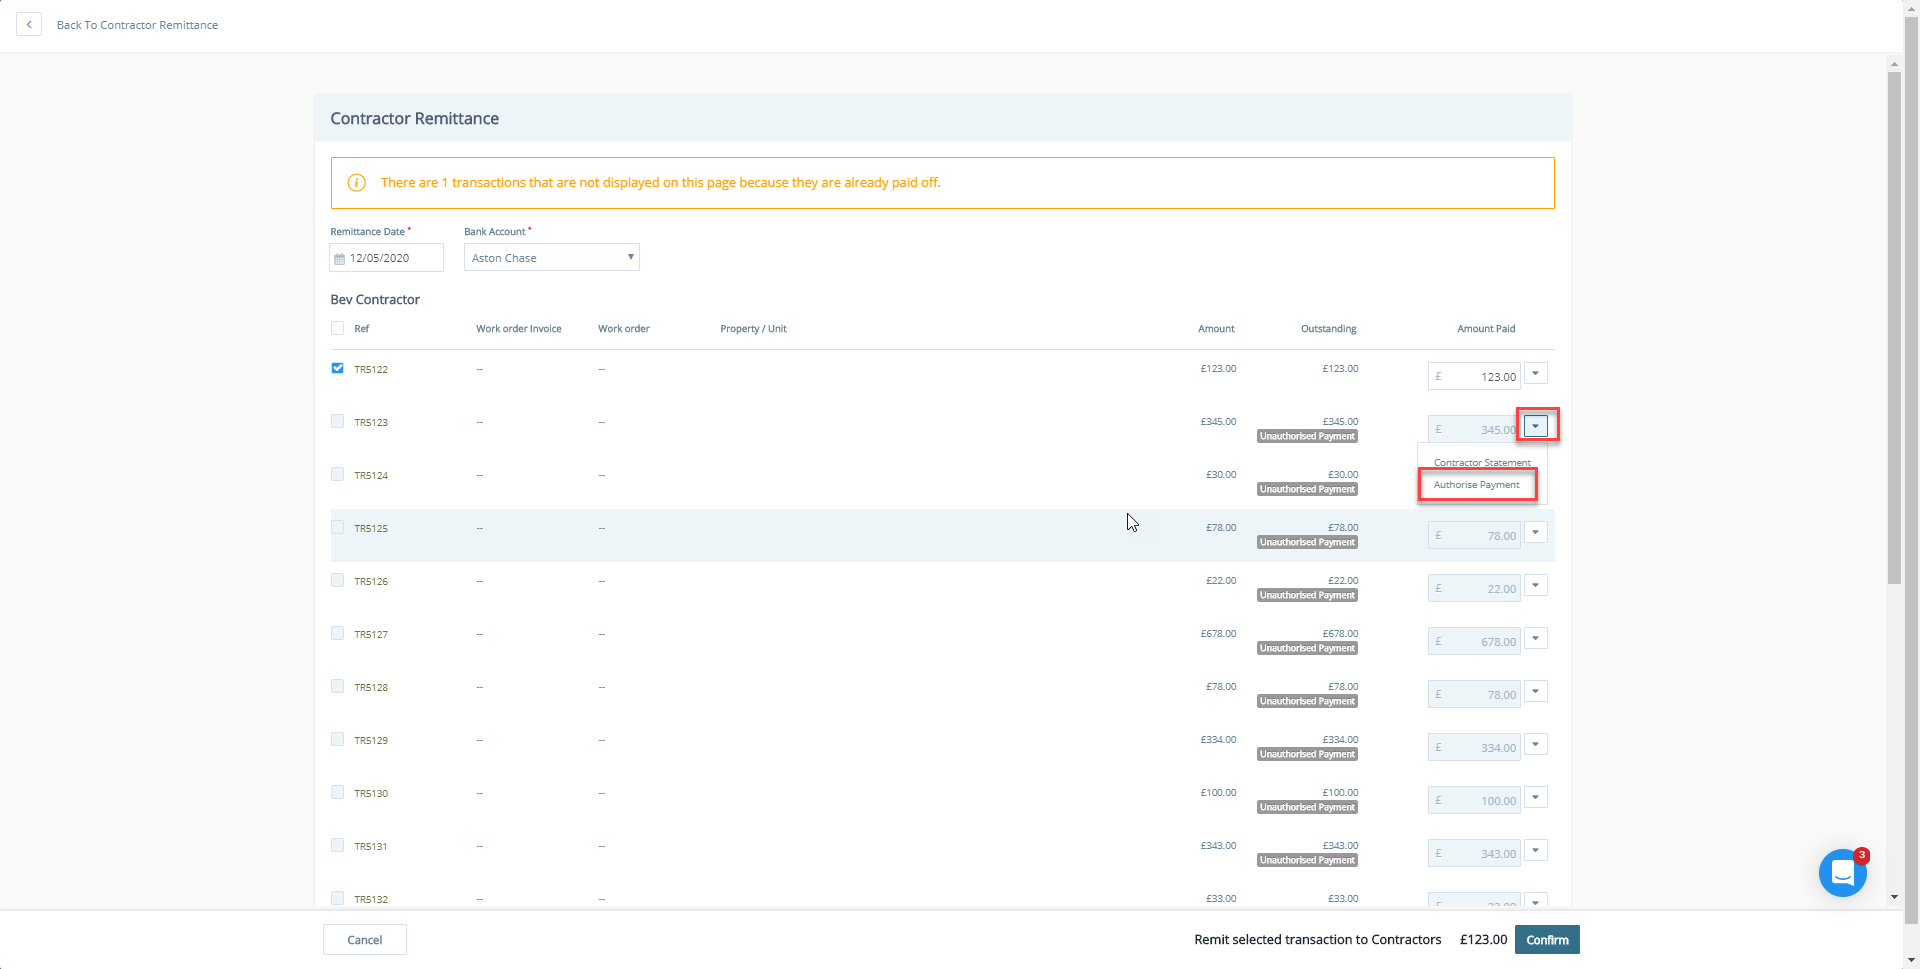
Confirm payment 
Contractor payments
Once confirmed the invoices can be batched and sent for payment

Step 1 Printing the PDF of each Payment record individually or in batch
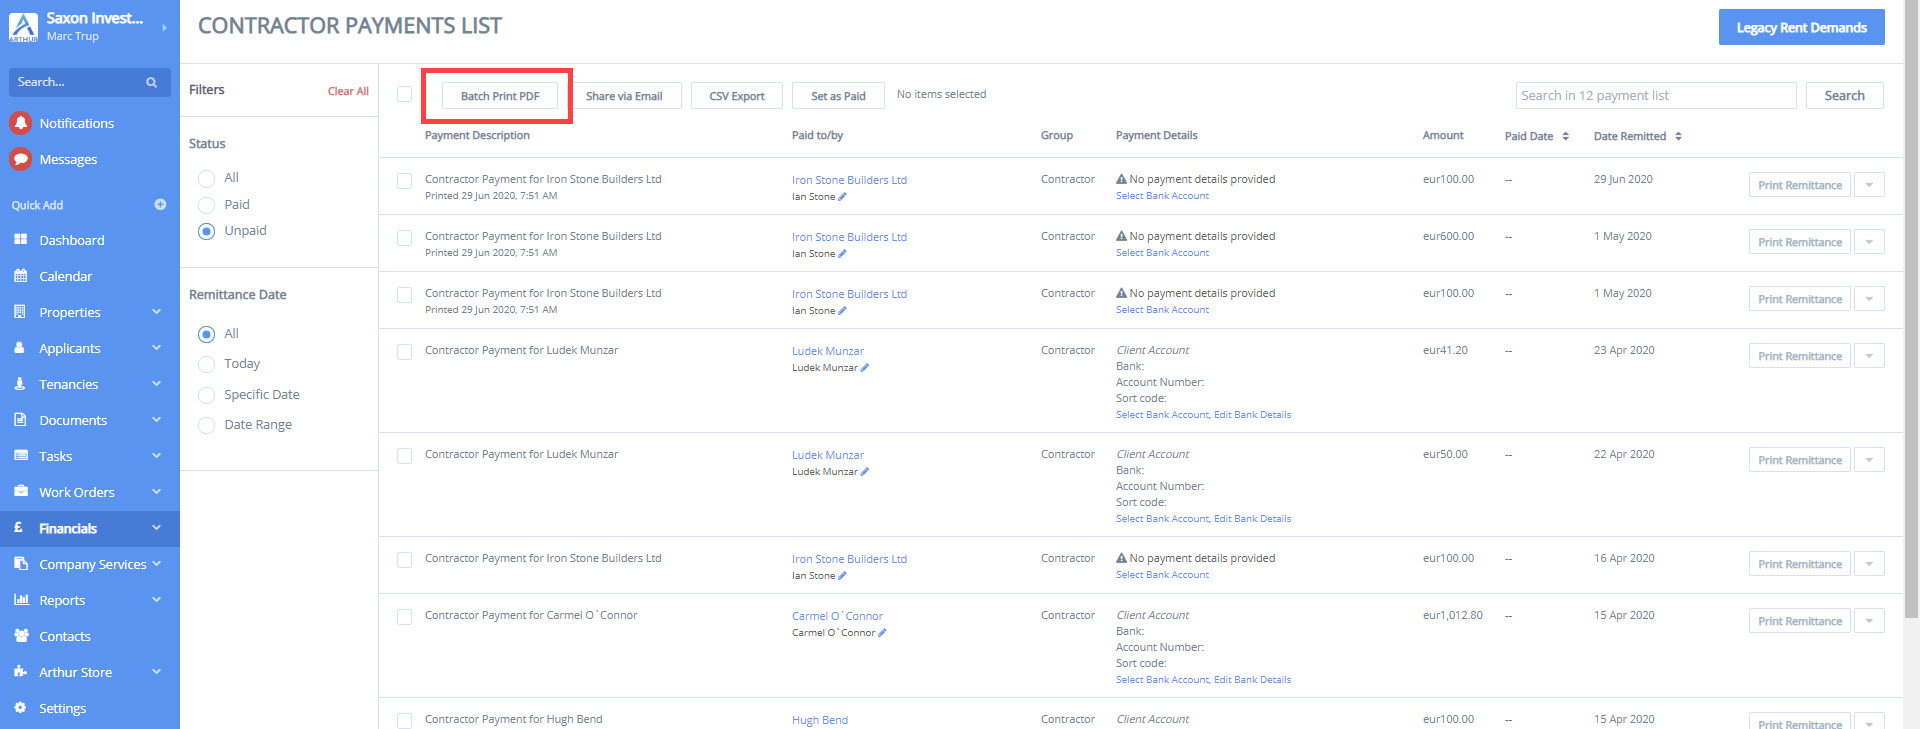
Step 2 Selecting a template, it is a template of the enhanced report, for creating the PDF

Step 3 After the print finish, the record which has a PDF will have a text ‘Printed’
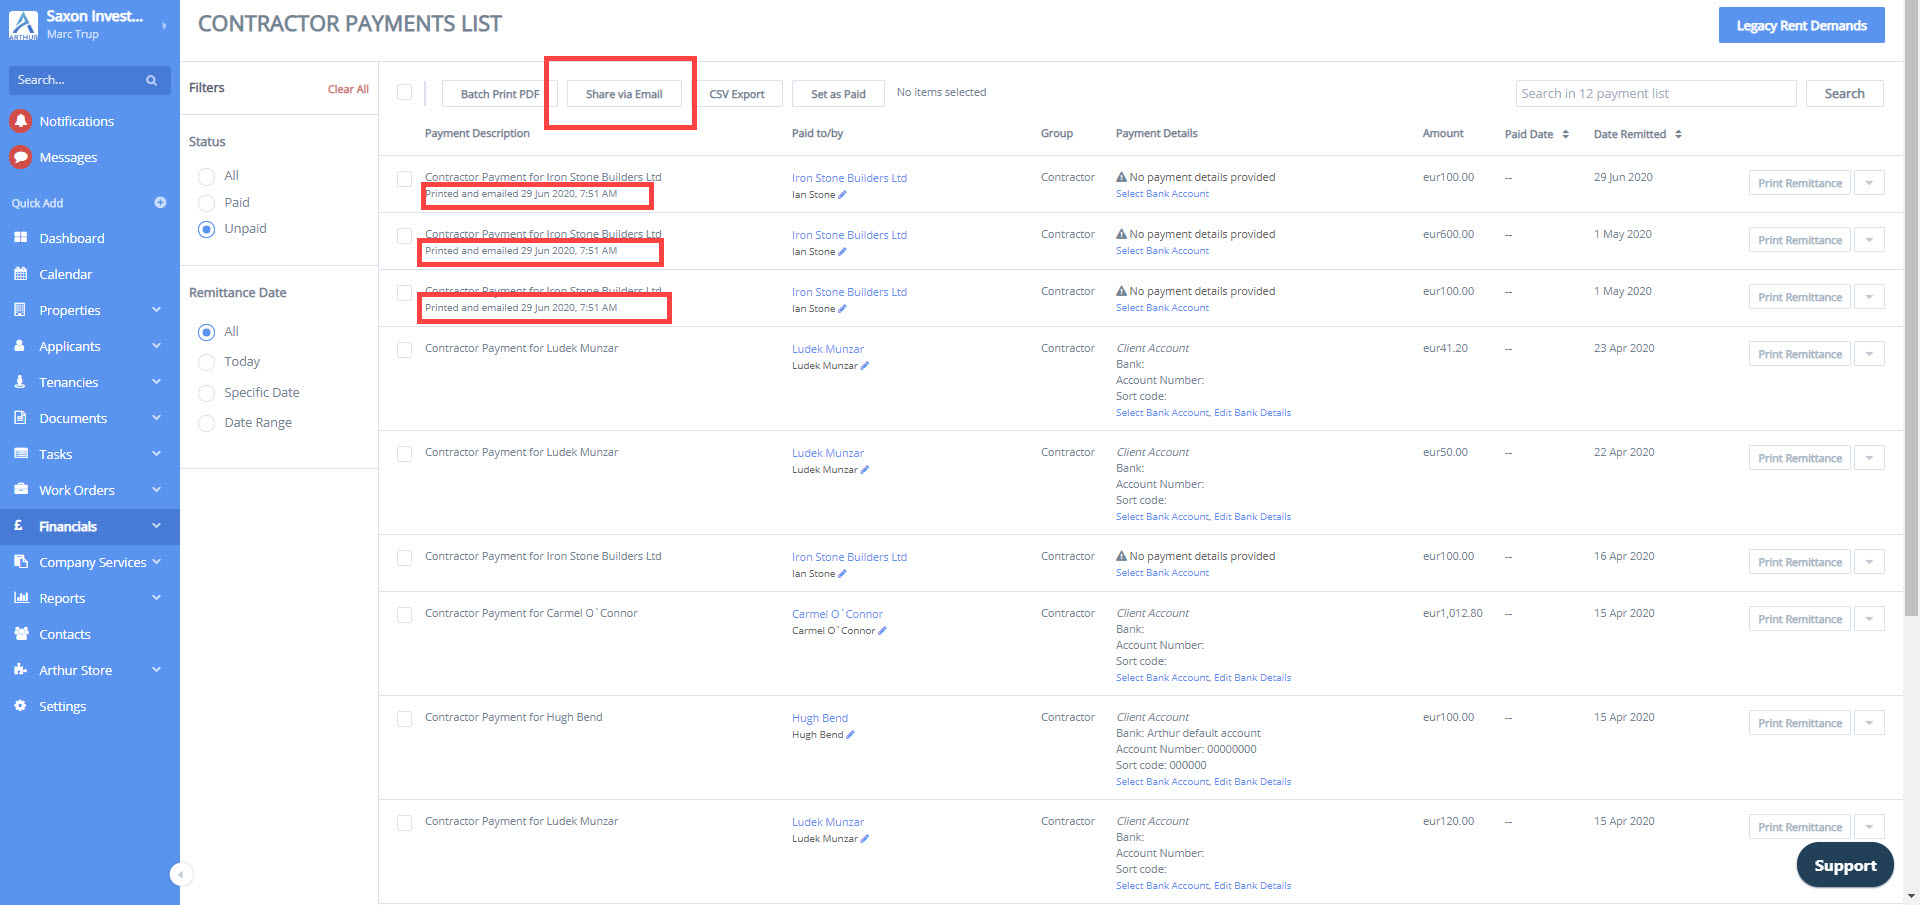
Step 4 When records having PDF then it can be select in Share via Email screen

Step 5 : Export payments CSV in batch to import into a bank account. If your online banking allows you to import payments you can use the CSV export to create the payment spreadsheet, ensure you have to input the correct bank account details of the contractors before exporting. Note: To update Contractor bank details by Contacts > Contractors (selecting the relevant contractor) > Bank Accounts)
Note: To set your preferences go to: Click your logo/name (top left) > Preferences > Financials > Payments Lists. Here you can select a default template for Property Owner, Contractor and Tenant as shown in the image below.
Step 6 Set as paid individually or in batch. Set as paid on this screen clears down transactions from this screen that have been successfully paid over to contractors.

Attachments (13)


Was this article helpful?
That’s Great!
Thank you for your feedback
Sorry! We couldn't be helpful
Thank you for your feedback
Feedback sent
We appreciate your effort and will try to fix the article