Note: It is important that you have a basic knowledge of Quickbooks and that you are able to setup a ‘New Organisation’ as a trial. For the purposes of the initial test you can use the default Quickbooks chart of accounts. We do not support integrations that are not carried out by members of Arthurs financial team. To see costs for us to integrate the two systems please go to the store.
To view/access the page below go to Financials > Synchronise and Settings: Please ensure that all your tenancies are entered and up to date, all your tenant, tenant deposit and property owner transactions are on Arthur and that your recurring charges are setup.
Getting Started
Step 1: Create a ‘trial’ organisation in QuickBooks Online Plus
*Do not add bank accounts into QuickBooks* Add any accounts codes that you may specifically need – otherwise leave blank. That’s it – no need to add anything else.Step 2: Get your Arthur up-to-date
Ensure: 1. All units and properties have owners assigned to them. 2. Recurring charges are setup properly. 3. Registered deposit charges and registered deposit receipts are correct. 4. All your bank accounts in Arthur have the bank account name, sort code and account number fields completed. Look at the tenant balances, property owner balances, and tenant deposit balances reports and satisfy yourself that they are correct.Step 3: Configure Arthur & QuickBooks by clicking on the connect

Step 4: Save Mappings
The screen below is similar in all five mapping screens. For example, click on the 'Mapping Account' tab and press the save mapping button at the bottom of the page. Repeat this for 'Mapping Tenancy', 'Mapping Class & Location', 'Mapping Bank Account' and 'Mapping Contact'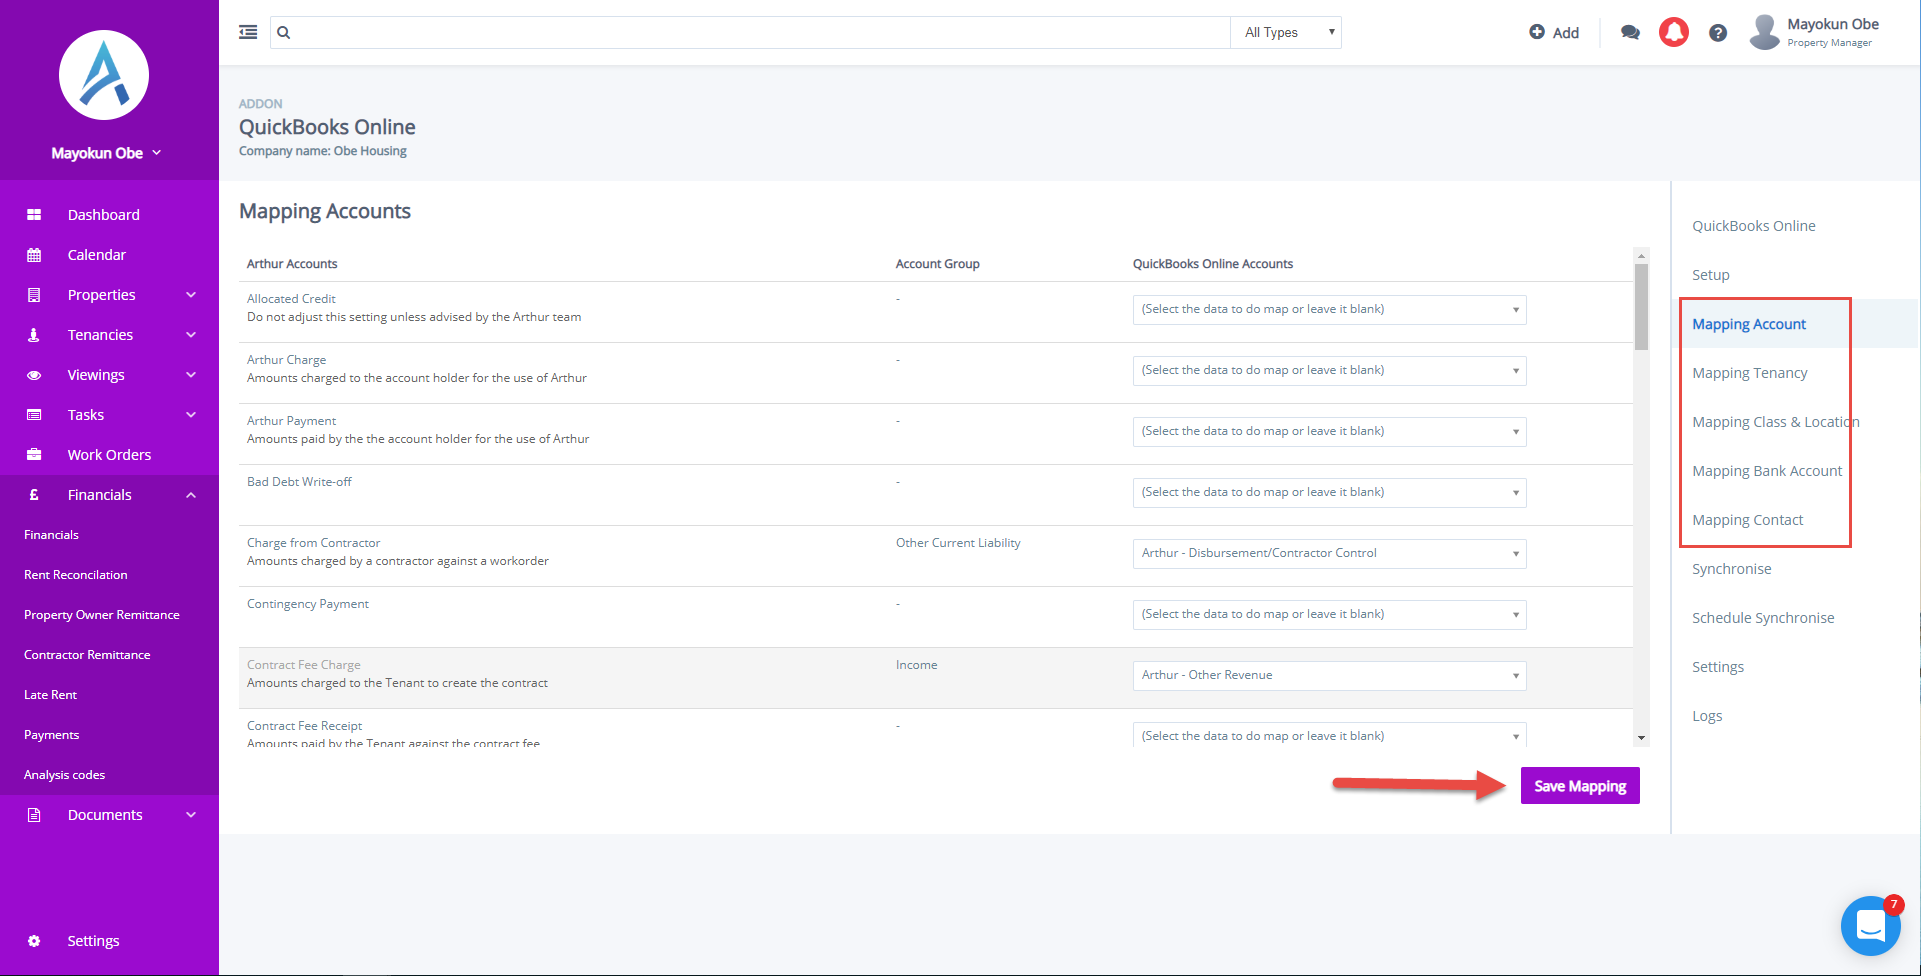 Note: Please make sure a Quickbooks item is selected for all tenant transactions that are on the rent or deposit statement. You can view/add items in QuickBooks within Sales > Products and Services

Step 5: Enable 'Tax Set-up' and 'Track Classes & Location'
- Tax Set-Up: Select ‘index’ and this will direct you to QuickBooks. Here, enable your clients tax rates.
- Enable Track classes and location: Select ‘index’ and this will direct you to QuickBooks. Here, you turn on both classes and locations.

Step 6: Synchronise the systems & check the following reports:
- Arthur Tenant balances report agrees with QuickBooks Aged Receivables report;
- Arthur Property Owner balances report agrees with QuickBooks Aged Payables report;
- Tenant Deposit balances report in Arthur agrees with the deposit balances held in QuickBooks.
Step 7
Subject to Step 6 being correct, return to Step 1 but this time connect to your live QuickBooks Online Plus account.Step 8
After the synchronisation is complete you will see that Arthur would have created your bank accounts in QuickBooks. You can then attach the bank feeds and start reconciling!


Was this article helpful?
That’s Great!
Thank you for your feedback
Sorry! We couldn't be helpful
Thank you for your feedback
Feedback sent
We appreciate your effort and will try to fix the article